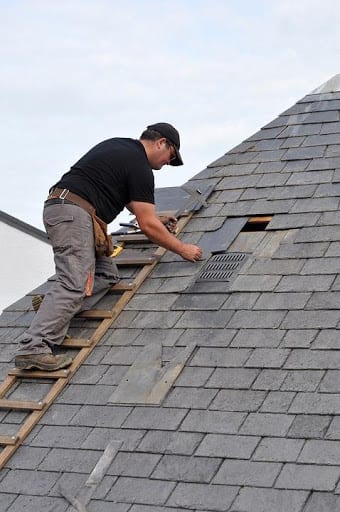
How to Fix a Leaking Roof and Prevent Further Leaks from Developing
Roof leaks are more than just a nuisance. If left unrepaired for too long, even the smallest leak can lead to significant water damage to the interior of your home. In some severe cases, leaks can lead to wood rot, compromising the structural integrity of your home’s entire roof. For those reasons and more, it’s highly recommended to fix a leaking roof as soon as you notice a leak.
How do you fix a leaking roof? Here is our quick DIY guide for fixing roof leaks:
Identifying The Source of the Leak
The first order of business is to identify where moisture is entering your home. For the most part, there are two main culprits when it comes to roof leaks.
1. Cracks and Holes
– Cracks and/or holes in your roof’s tiles are usually the number one cause of leaks. Cracks and holes develop naturally due to severe weather conditions, falling debris from nearby trees, and wear and tear.
The easiest way to locate a crack or hole in your roof is to head up into the ceiling with your smartphone. Using the flashlight function on your phone, scan the ceiling for signs of water streaks. This will usually lead you straight to where moisture is coming from. If there are no obvious streaks, shut off the lights and cover any windows. You should be able to notice a streak of light coming in from where the crack or hole is located.
2. Clogged Gutters
– The build-up of debris along your gutters will easily act like a dam and trap water. During times of heavy rain, your gutters are unable to efficiently dispose of water. This may end up forcing the water to flow back underneath loose tiles and into your home.
Use a ladder to reach your roof and inspect your gutter system. Try to remove any blockage you find. Afterwards, pay close attention to see if your roof still leaks.
How to Fix a Leaking Roof Quickly
Sheet Metal Flashing
– If you have some time on your hands, you can try using 12×12 sheet metal flashing. This is often available at your nearest local hardware store. Carefully climb up to your roof with your tools and the sheet metal. Gently lift the damaged shingle to avoid further damage and slide the sheet metal flashing into place, covering the crack or hole. If done correctly, this should prevent water from seeping into your home.
Silicone Sealants
– If you want to learn how to fix a leaking roof quickly, you’ll need to grab a tube of silicone roof sealant. Carefully climb up to the spot where you located the hole or crack. Apply a generous amount of the silicone sealant and wait for it to dry completely. It’s that simple!
Call in the Roofing Experts ASAP to Fix a Leaking Roof
The two DIY fixes above are effective at stopping leaks – but these are only a stop-gap measure. Quick fixes like those can only do so much and will fail eventually. These “fixes” are best used as a way to prevent leaks from causing too much water damage to your home’s interior. After you’ve applied either of the two quick fixes, it’s best to call a trusted roofing service like FIXME Plumbing. Professional roofing contractors can help repair any damage to your roof, as well as more complex repairs like tile replacement.
How to Stop Roof Leaks from Developing in the Future
After you’ve had your roof repaired, it’s only natural for you to want to prevent more leaks from developing. Here are a few things you can do to minimise the chances of your roof developing more leaks:
Visual Inspections After a Storm
– Storms can easily damage roof tiles, so it’s a good idea to do a visual inspection of your roof after a storm rolls through your area. For your safety, it’s best to use a pair of binoculars to inspect your roof instead of climbing up and walking along your roof. This is especially true for roofs with a high pitch. Any damage you spot should be fixed ASAP to prevent leaks.
Clean Out Your Gutters
– Gutters should be cleaned out at least twice a year. The best time to do this is to check late in the Spring and early in the Autumn. If there are a lot of trees with branches extending over your roof, it may be a good idea to clean your roof more often since fallen leaves and other debris will accumulate much faster in such a scenario.

